A microSD + crypto shield for AVR stick
30 November 2014
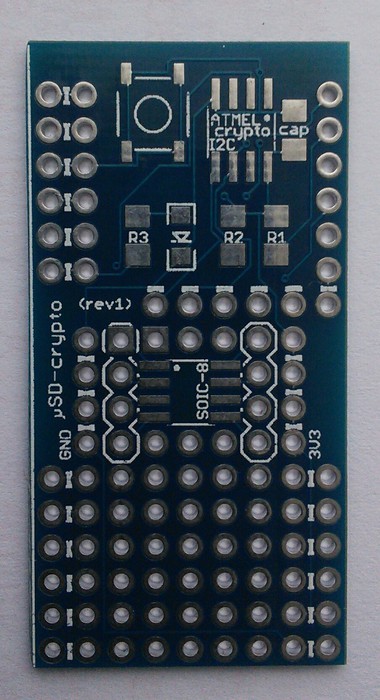
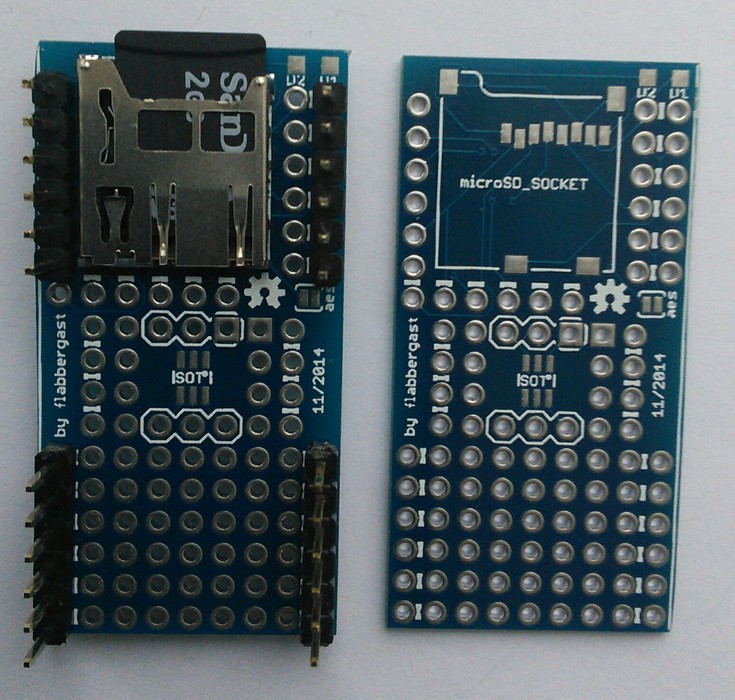
A shield for Stephan's fantastic AVR stick is in the works! It has the same format as the AVR stick itself, 5cm x 2.5cm. I want to use the AVR stick as an encrypted "mass" storage, so the features are
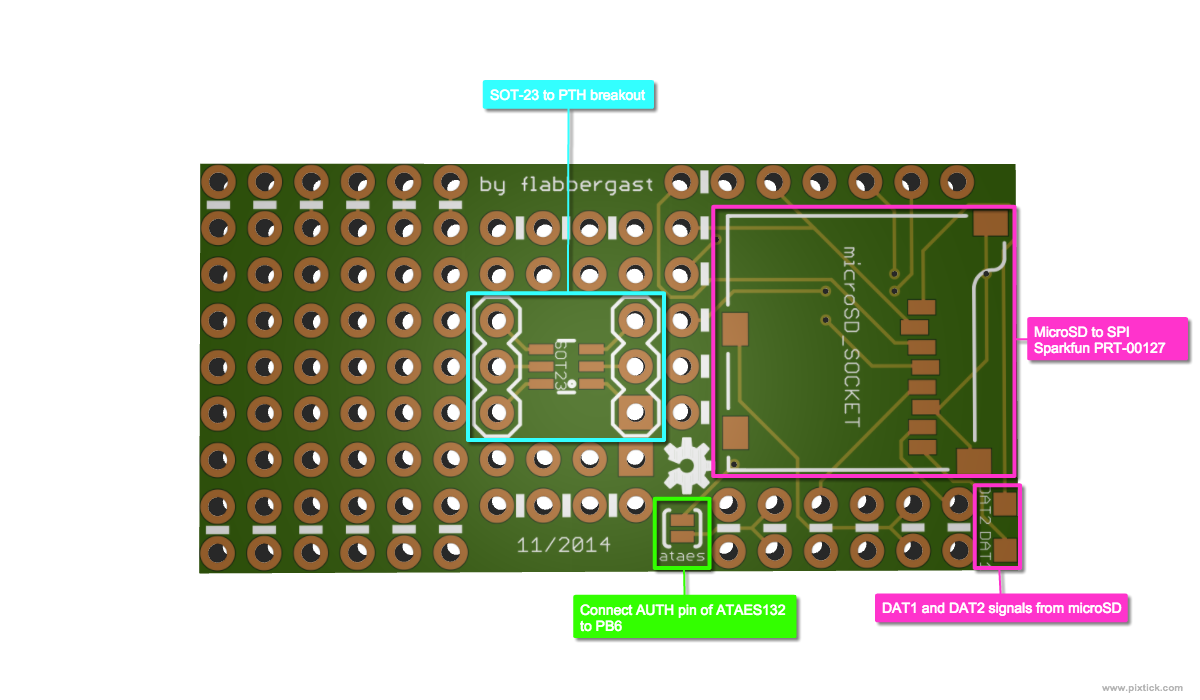
- MicroSD slot, connected to SPI pins of the xmega.
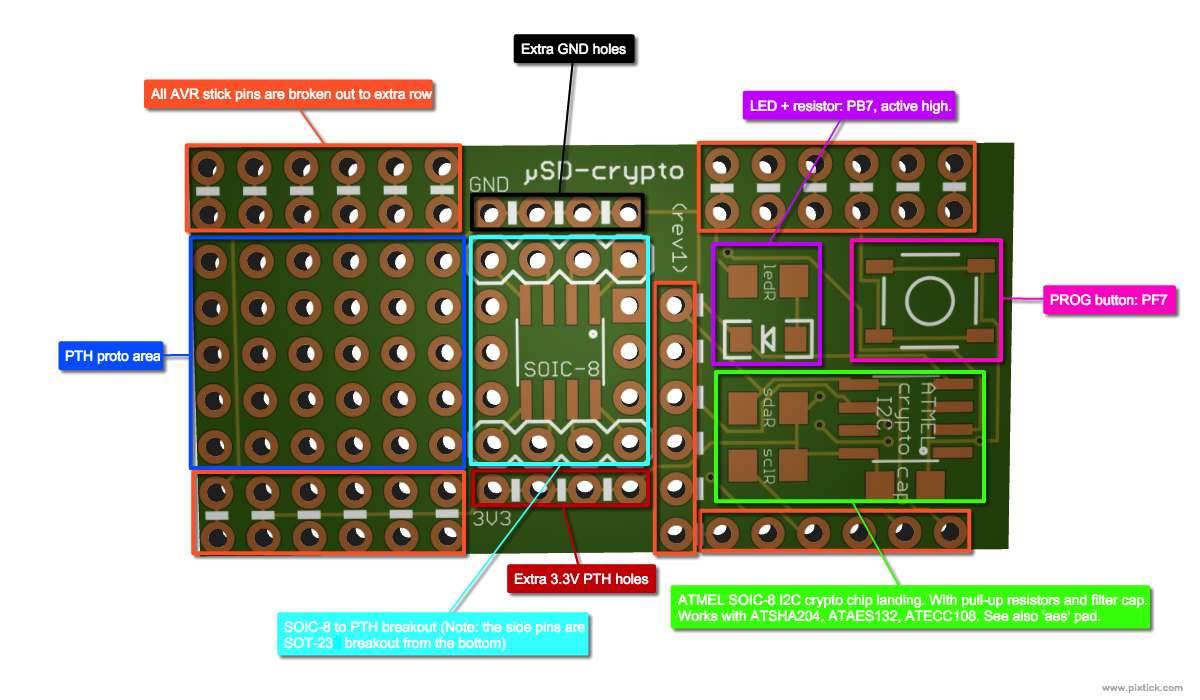
- Pads for an I2C ATMEL crypto chip: the ones that fit are for instance ATSHA204, ATAES132 or ATECC108. The pinout is also compatible with I2C EEPROMs (SOIC-8-NARROW (JEDEC). Also the address select pins are not connected to anything, so you may need to tie them together by solder bridges.).
- One LED.
- One pushbutton.
- Proto area with SOIC-8-NARROW, SOT23-6 and some PTH pads.
NOTICE: I've got plenty of PCBs left, so if you'd like one, ask me by
email {vtakovina [plus sign} flabbergast {at sign] gmail (dot character} com}.
I can send you one for $1 plus postage (from UK). I also have some parts
left, so if you'd like those (cap, resistors 2x1kR 1x4.7kR, button, blue
LED) as well, add $2. You can also have one ATSHA204A for an extra $1.
Unfortunately I have no microSD sockets left - so you'd need to get one
yourself.
There was a lot of space left, so there's 5x5 PTH prototyping area, SOIC-8 and SOT-23 landings broken out to PTH holes and all the AVR stick's pins are also broken out to PTH pins. This can be used in variety of ways, for instance for temperature sensors (SOT-23 or PTH), IR transmitter/receiver (PTH), real-time clock (SOIC-8, with battery backup in the PTH area), extra buttons or LEDs (PTH)... (Note that the SOIC-8 landing is for the narrow (JEDEC) version; the wide version doesn't quite fit.)
Layout
Here are the EAGLE files.
Here are some rendered images with annotated layout (click to enlarge):
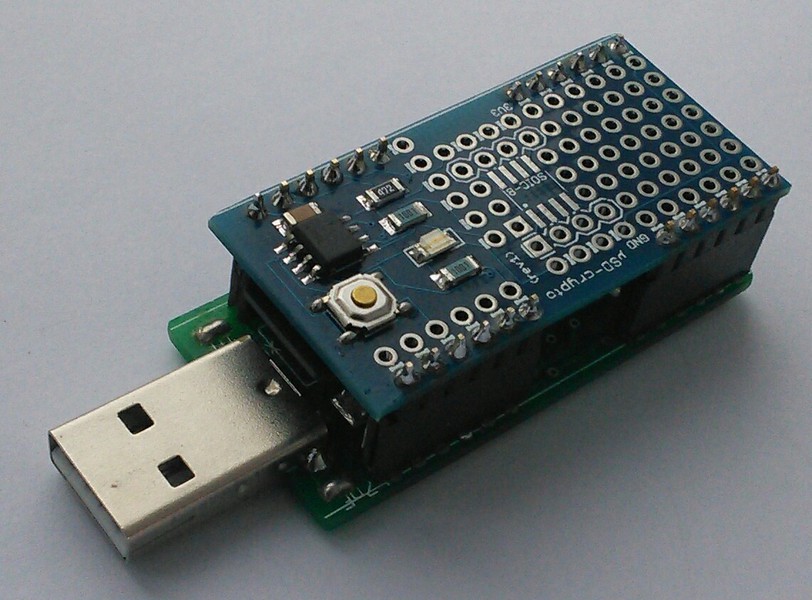
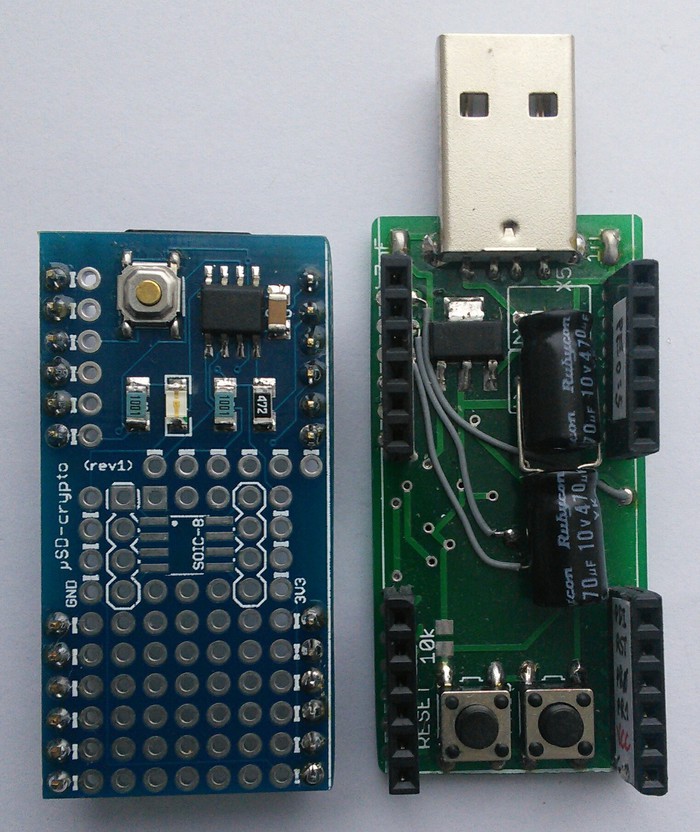
Pictures of the real thing
Connections
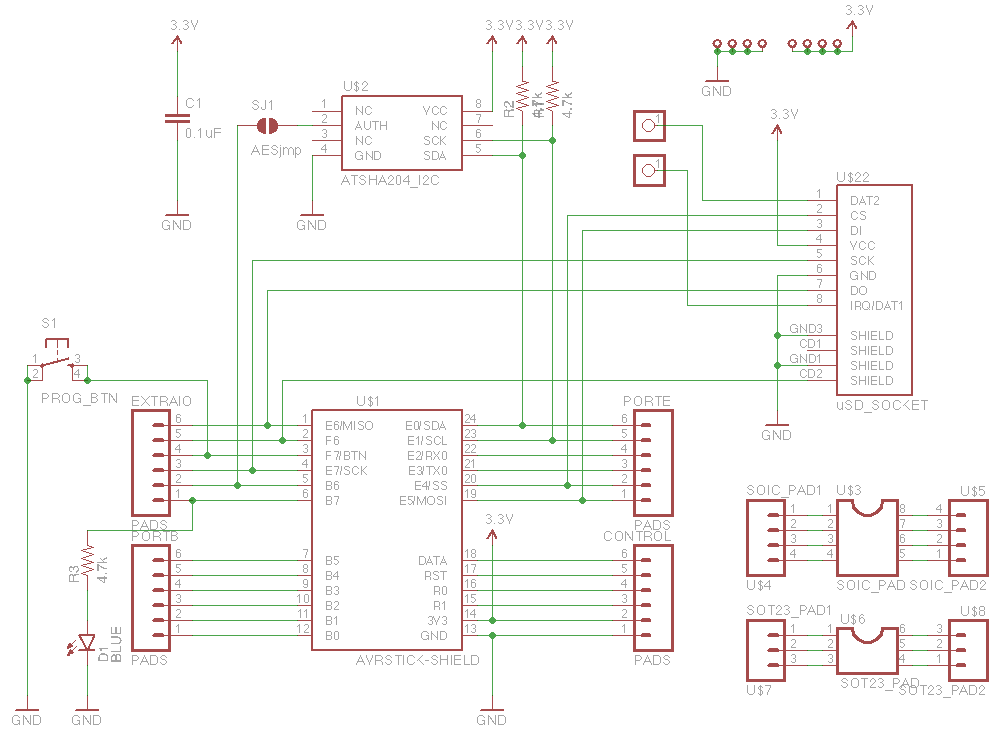
The connections can be seen also from the schematic below, but here's a summary:
- microSD is wired to SPI pins + some extra (
SCK<->SCK/PE7, DO<->MISO/PE6, DI<->MOSI/PE5, CS<->SS/PE4, CD2<->PF6 (Card Detect)). DAT1 and DAT2 from microSD are brought out to pads.
- The "ATMEL crypto" SOIC-8 landing matches the pinout of the above mentioned chips, i.e.
pin4<->GND, pin5<->SDA/PE0 (with a pull-up), pin6<->SCK/PE1 (with a pull-up), pin8<->3V3. Finally pin2 is brought out to a solder jumper on the bottom side, with the other end connecting to PB6.
- The LED connects (through a resistor)
PB7 and GND (so lights up when HIGH).
- The pushbutton is between
PF7 and GND, exactly as the PROG button on the AVR stick. The point is that the shield kind of obscures the buttons on the stick itself, and I consider this one more useful to have on top.
One thing to be aware of is that pins PB6 and PB7 are a part of JTAG interface (by default enabled by Stefan). So JTAG needs to be disabled if one wants to use the LED (can be done in firmware).
The shield can be mounted on the AVR stick either on top (in which case it needs to clear the electrolytic caps - a standard pair of female-male headers to make the shield pluggable does the job), or on the bottom, in which case the button on the shield is unusable (but then one can use the original PROG button for the same functionality).
One a bit unpleasant thing is that both the button and the microSD socket are on the "computer"-end of the stick (i.e. the one with the USB-A male socket). The reason for doing it this way is mainly that both SPI and I2C pins are on that end of AVR stick, so putting things on the "proper" end of the stick would require a lot of routing through the "proto area". I didn't want that. Another good thing is that it discourages from changing the microSD card while the stick is connected to a computer.
Parts
The rev1 version uses parts from Sparkfun - which are not the cheapest
(by far), but can be ordered easily from several online stores in Europe
in small quantities.
- MicroSD socket
- Mini pushbutton - I just like how this one looks, it's the same as on Arduino Pro Minis.
- Other parts are just standard 1206 SMT parts: one 4.7kOhm (SCL) and one 1kOhm (SDA) pull-up resistors, one 1kOhm limiting resistor for LED, one 0.1uF ceramic capacitor and one (I used blue) LED. I got the LEDs from Sparkfun as well: 25 pack of LEDS.
- Finally, the ATMEL crypto chips. ATSHA204 can be found at some big chip distributors also in Europe, but ATAES132 only in US (export restrictions on crypto I think). So I ordered it from Mouser - apart from horrendously expensive shipping, it went smoothly. Now I'd like to get my hands on some ATECC108, but that one I found hard to find, and also ATMEL doesn't publish its datasheet, only some example code. (A non-disclosure agreement needs to be signed to get the datasheet.)
Note that CryptoCape is
a cape for BeagleBone Black that has all these ATMEL crypto chips on it,
along with an atmega328p (i.e. "Arduino"), so it looks nice to try!
Firmware
To follow up on my first post about the enstix firmware (post here), I've updated my firmware (making AVR stick into an encrypted storage) to use the microSD for storage, instead of xmega's flash. With a microSD, it also works on other ATMEL chips with USB support, for instance atmega32U4 (Arduino Leonardo). It's still work in progress.
One important thing to realise is that using microSD for storage like this is slow. I'm getting about 120kB/sec for reading on xmega, and about 30kB/sec for reading on atmega32U4 - the m32U4 runs slower, thus SPI is slower, and the crypto is implemented in firmware, so it slows down the reads quite a bit.
